Kubernetes | Architecture, Components, and Configuration

In this blog, I am going to discuss Kubernetes, Kubernetes Architecture, Kubernetes components, and its configuration.
I am getting started with the 7-day #KubeWeek challenge by Shubham Londhe. #TrainWithShubham #KubeWeekChallenge
Kubernetes
Kubernetes is an open-source container orchestration platform that automates the deployment, scaling, and management of containerized applications.
Before I deep dive into this, here is the link to official Kubernetes documentation which supports and helps in troubleshooting almost all issues that arise: Kubernetes Documentation.
Kubernetes Architecture

The Kubernetes Architecture consists of two nodes: Control Plane/Master Node and the Worker Node. The Master Node and the Worker Node together make the Kubernetes Cluster. Kubernetes is a distributed system.
In one Kubernetes Cluster, there can be only One control plane (Master Node), and one or more than one Worker Node.
The control plane is responsible for managing and maintaining the overall state of the Kubernetes cluster.
Worker nodes are the hosts that run the pods and the containers that make up the applications deployed in the Kubernetes cluster.
Kubernetes Components
The components of Kubernetes can be classified as Control plan Components and Worker Node components.
Control Plane Components ( Master Node)
The components of the Control Plane are API Server, etcd, kube-scheduler, and the kube-controller manager.
API Server
The API server acts as the primary management point for the Kubernetes cluster. It is the front end of the Kubernetes Control Plane.
API Server can scale horizontally, which means for scaling it uses the deployment of instances.
It provides a REST API that enables users to interact with the cluster and manage its resources. It acts as the primary interface for users and external systems to interact with the cluster and perform actions such as creating or updating deployments, scaling applications, or monitoring the state of the cluster.
etcd
etcd is a distributed key-value store that stores the configuration data for the Kubernetes cluster.
It stores information about the state of the cluster, such as the current status of the nodes and the configuration of the deployed applications.
etcd can scale horizontally. etcd ctl is a CLI tool to interact with etcd server.
kube-scheduler
The kube-scheduler is responsible for scheduling pods on the worker nodes.
When a user creates a new pod or scales up an existing deployment, the kube-scheduler is responsible for selecting a suitable node for the pod to run on. It takes into account factors such as CPU RAM, resources required, data locality, and other policies to determine the best node to run a given pod.
Its primary role is to ensure that each pod is scheduled to run on an appropriate node that can satisfy its resource requirements and other constraints.
kube-controller-manager
The kube-controller-manager is responsible for managing the controllers that maintain the desired state of the cluster.
It includes controllers such as the node controller, which manages the nodes in the cluster, and the replication controller, which manages the replication of pods. Cron jobs, deployment controller, persistent volume protection, etc. are all a part of kube-controller-manager.
Worker Node Components
The components of the Worker Node are kubelet, kube-proxy, and Container Runtime.
kubelet
The kubelet is responsible for managing the pods on the node.
It ensures that the containers in the pod are running and healthy, and communicates with the API server to receive instructions for managing the pods.
One needs to install the kubelet manually on worker nodes.
kube-proxy
The kube-proxy is responsible for managing the network connectivity between the pods and other services in the cluster.
It performs load balancing and sets up network routes to enable communication between the pods.
It runs on each node, using IP Table rules so any services from outside can connect to the pods.
Container Runtime
The container runtime, such as Docker, is responsible for running the containers that make up the pods.
When a pod is scheduled on a worker node, the Kubernetes kubelet communicates with the container runtime to start the containers that make up the pod. The container runtime is responsible for creating the containers and setting up their networking and storage resources, as well as monitoring their health and resource usage.
Kubernetes Installation and Configuration
There are various ways to install a Kubernetes cluster in an environment like using Minikube, through cloud-managed Kubernetes services, or through kubeadm.
Let us learn how to set up a Kubernetes cluster via kubeadm.
A few prerequisites are required for the servers/VM
2 vCPU
4096 MB of RAM with 20 GB of free space.
The OS version needs to be Ubuntu 16.04 or more.
Note: I will discuss on how to install K8s along with commands and screenshots, and hence I will discuss the general steps involved.
Installation Set Up
Before going ahead to install K8s, prepare the VM. Change to root. Swap off on both Master and worker nodes, and bridge the traffic.
Disable Swap. Run it on both Master and Worker Nodes.

swapoff -a
sudo sed -i '/ swap / s/^\(.*\)$/#\1/g' /etc/fstab
Bridge Traffic
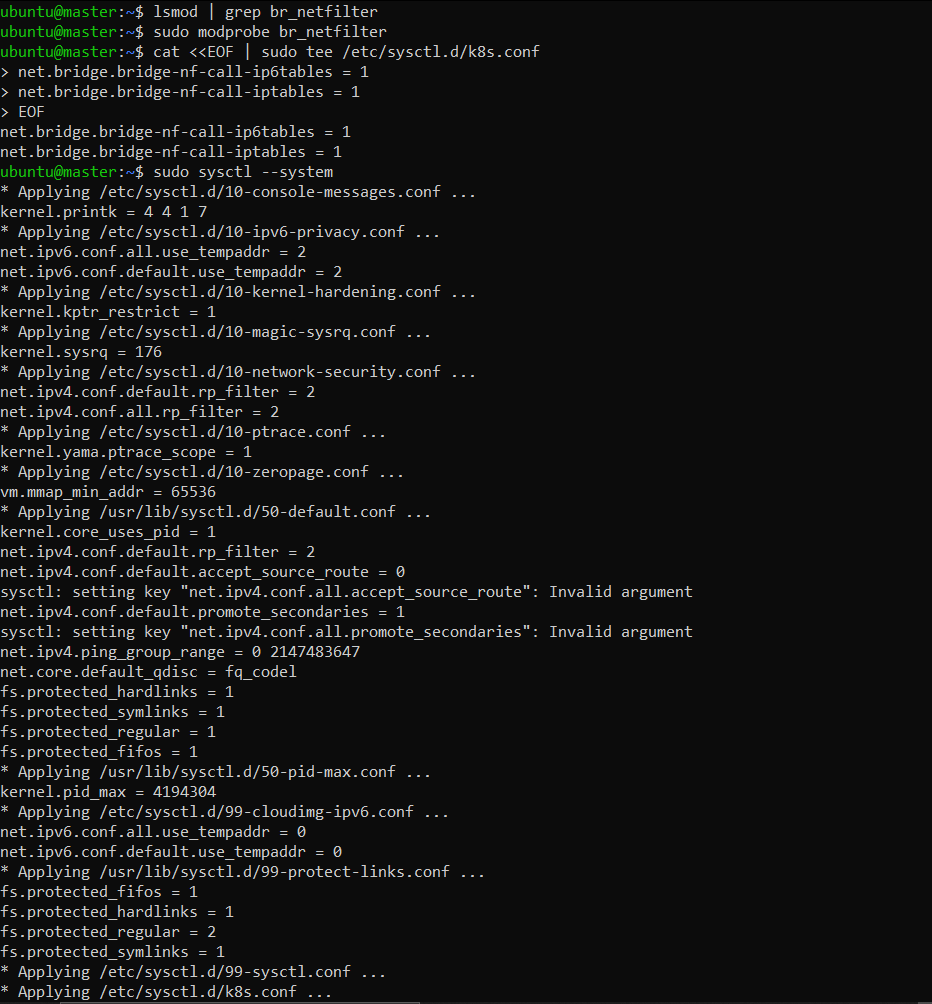
lsmod | grep br_netfilter
sudo modprobe br_netfilter
cat <<EOF | sudo tee /etc/sysctl.d/k8s.conf
> net.bridge.bridge-nf-call-ip6tables = 1
> net.bridge.bridge-nf-call-iptables = 1
EOF
sudo sysctl --system
"lsmod | grep br_netfilter" will load the module. As a requirement for the Linux Node, IP tables to correctly see bridged traffic, ensure net.bridge.bridge-nf-call-iptables is set to 1 in your sysctl configBridge Traffic.
Install Docker on both Master and Worker Nodes.
Install Docker

apt-get update
apt install docker.io -y
sudo systemctl start docker
Setting up the Docker daemon

cat <<EOF | sudo tee /etc/docker/daemon.json
{
  "exec-opts": ["native.cgroupdriver=systemd"],
  "log-driver": "json-file",
  "log-opts": {
    "max-size": "100m"
  },
  "storage-driver": "overlay2"
}
EOF
Restart the docker service
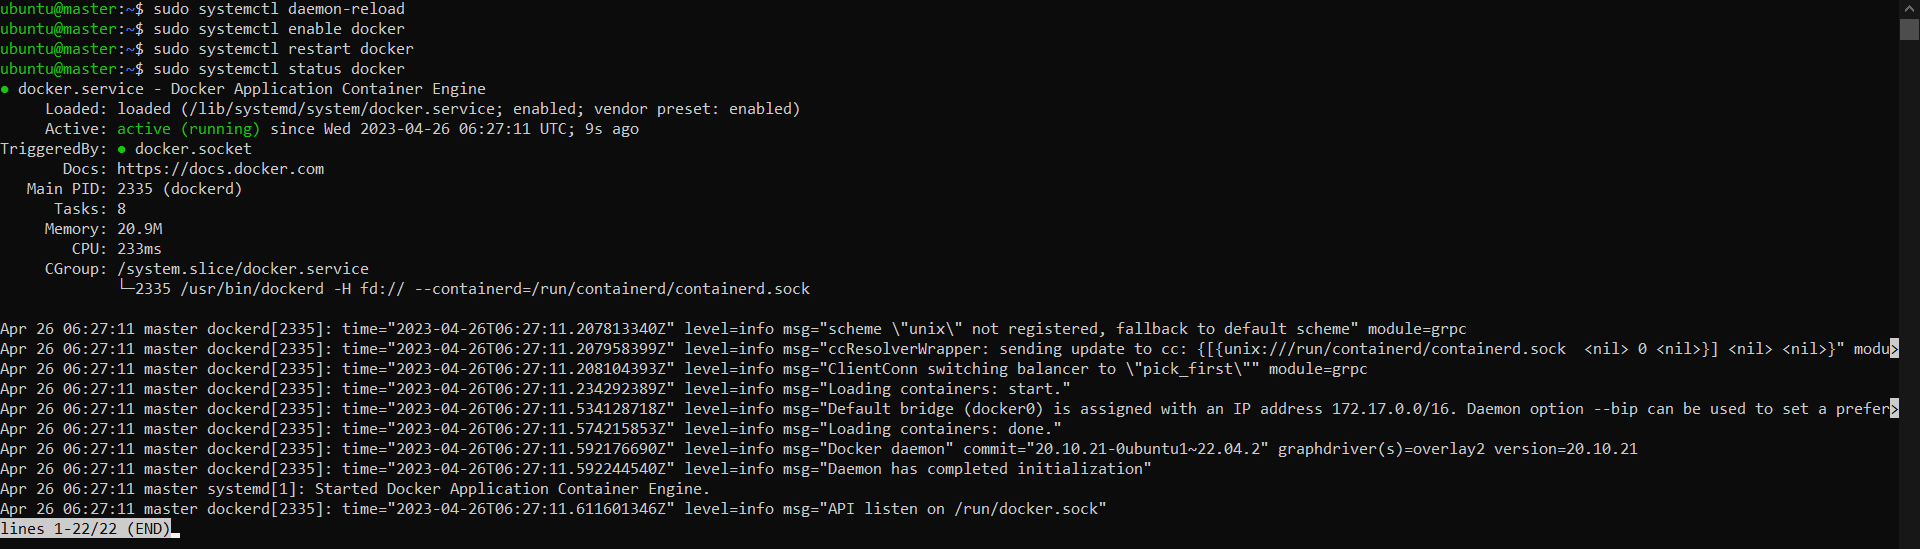
sudo systemctl daemon-reload
sudo systemctl enable docker
sudo systemctl restart docker
sudo systemctl status docker
The docker service is running.
Install kubeadm, kubelet, and kubectl on both Master and Worker Nodes.
sudo apt-get update && sudo apt-get install -y apt-transport-https curl
sudo curl -s https://packages.cloud.google.com/apt/doc/apt-key.gpg | sudo apt-key add -
cat <<EOF | sudo tee /etc/apt/sources.list.d/kubernetes.list
deb https://apt.kubernetes.io/ kubernetes-xenial main
EOF

sudo apt-get update
sudo apt-get install -y kubelet kubeadm kubectl
sudo apt-mark hold kubelet kubeadm kubectl

Start and enable Kubelet
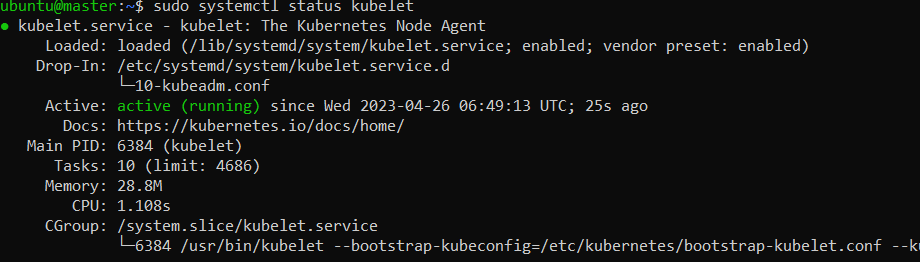
sudo systemctl daemon-reload
sudo systemctl enable kubelet
sudo systemctl restart kubelet
sudo systemctl status kubelet
Initialize kubeadm on Master Node only.


kubeadm init --pod-network-cidr 10.0.0.0/16
Copy the token as we will need it to join the worker node to the master node.
Chances are that you can get many errors while initializing the kubeadm. You can go through this web page Kubernetes: kubeadm init | error execution phase preflight. This page has almost all solutions for the error execution phase preflight.
Create a new ‘.kube’ configuration directory and copy the configuration ‘admin. conf’ from ‘/etc/kubernetes’ directory.

mkdir -p $HOME/.kube
cp -i /etc/kubernetes/admin.conf $HOME/.kube/config
chown $(id -u):$(id -g) $HOME/.kube/config
Install Container Network Plugin Master Node only.
kubectl apply -f "https://cloud.weave.works/k8s/net?k8s-version=$(kubectl version | base64 | tr -d '\n')"
Join the worker nodes to master.
Paste the join command output from the kubeadm init output to join the worker node to the master node.
To help me improve my blog and correct my mistakes, I am available on LinkedIn as Sneha K S. Do reach me and I am open to suggestions and corrections.


